
 1706
1706
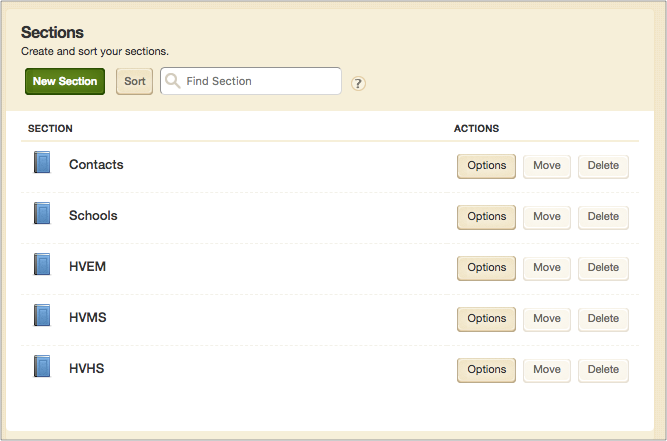
Sort, edit, move, and delete sections
Select Options beside a section name to edit it and delete it. Select Sort to drag-and-drop the sections in the order you want. Select Movebeside a section name to move it to another site. Select Delete beside a section name to delete it.
Use a friendly web address
Use a web address that is easy to read and remember.
- In Site Manager, find the section you want to edit.
- Select Options.
- Select Advanced.
- Type your Friendly Web Address without spaces. For example, Basketball.
- Select Save.
Hide or show a section
- In Site Manager, find the section you want to edit.
- Select Options.
- Select Advanced.
- Select the Hide Section in Channel Navigation check box to hide it. Unselect the check box to show it.
- Select Save.
Map sections to files, pages, and websites
- In Site Manager, find the section you want to edit.
- Select Options.
- Select Advanced.
- Paste the file or website address or browse for a page in the Map Section to Web Address field.
- Select Save.
Pages allow you to branch out your information for a cleaner, more logical flow. Use pages to split up your course information into smaller chunks. Creating pages makes managing and editing your course content simpler and faster.
Using the classic page experience? Check out the More about this app section to add content.
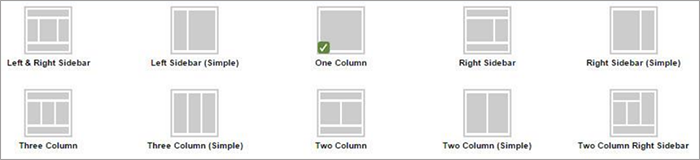
Set page layout
Choose the layout for your pages. You can use the same layout for every page or change the layout based on the page content. There are ten layout options you can choose for your page.
Some layouts are better suited for certain apps or combinations of apps than others. You can find some suggestions in our Best Practices document.
Page configuration best practices
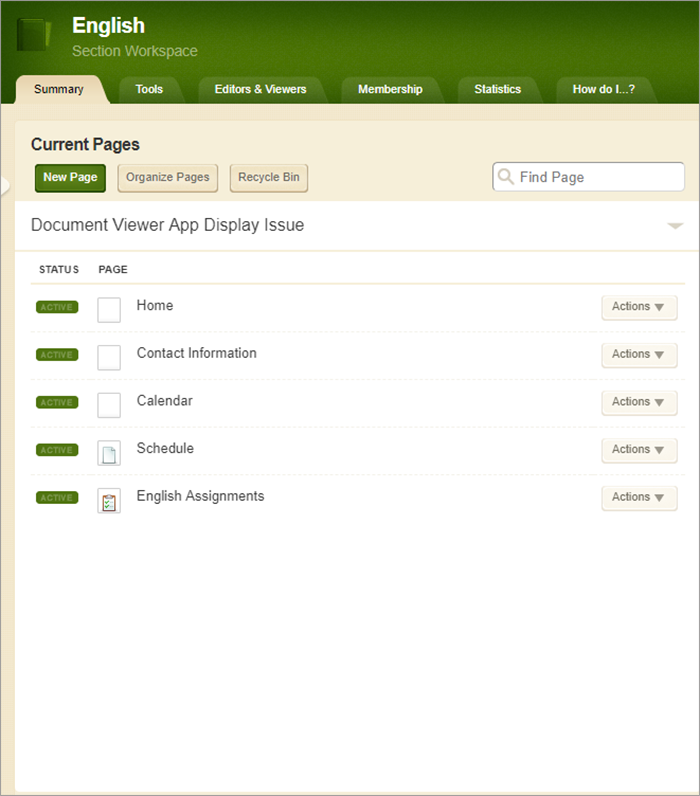
Add a page
Navigate to your section workspace and select New Page.
- Enter the Page Name.
- Select the type of page you want to add.
- About Teacher: Useful for teacher information pages.
- Alumni Directory: Useful for cataloging and displaying alumni information.
- Article Library: Useful for highlights, newsletters, and meeting minutes.
- Assignments Page: Useful for adding and displaying homework assignments.
- Basic Page: This page type keeps things simple with an image app, a heading app, and a content app already added.
- Blank Page: This page type is a blank canvas, with a single column layout and no apps included.
- Blog Page: Useful for collaborative learning and communicating with parents.
- Book List: Useful for displaying recommended or required books.
- Calendar Page: Useful for displaying due dates, sport schedules, and registered events.
- Department Homepage: Useful for creating a department homepage.
- Discussion: Useful for facilitating discussions.
- File Library Page: Useful for policies, forms, and software updates.
- Link Library Page: Useful for helpful links, fun links, and homework links.
- Maps & Directions Page: Useful for directions to athletic events and school locations.
- Photo Gallery Page: Useful for sharing photos of school activities like classroom projects and field trips.
- Podcast Page: Useful for showcasing school concerts and sharing foreign language assessments.
- Q&A: Useful for enabling users to submit, discuss, and rate questions and answers.
- Wiki: Useful for creating a simple Wiki.
- Select Save & Continue to begin editing the new page or Save & Exit to return to the section workspace. Optionally, select Cancel to quit the new page process.
Edit and organize your pages
Choose how you want your pages to be arranged on your site and select different editing options for each page.
- Select Organize Pages to change the order in which pages appear. You can choose to organize them in alphabetical order or you can drag and drop pages into the order you want.
- Select Save.
- Select Recycle Bin to restore deleted content.
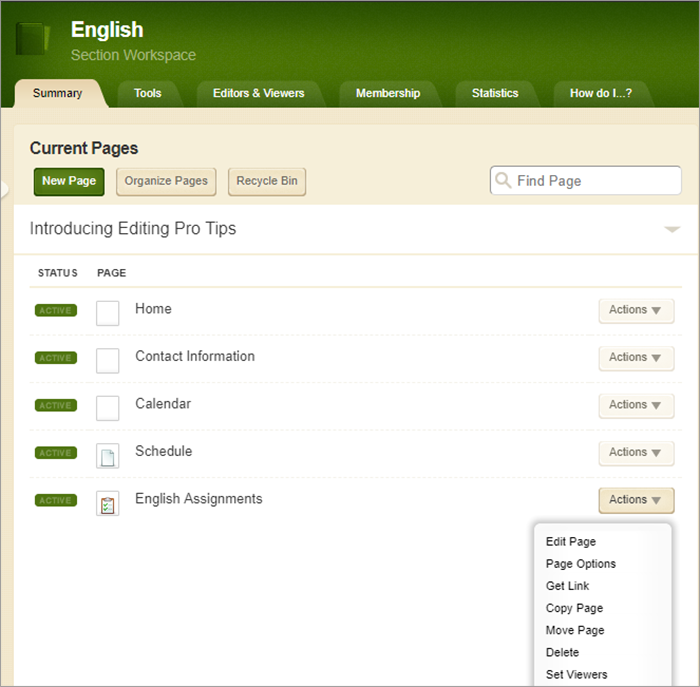
- Select Actions next to each page to expand the list of options for that page.
- Edit Page: Edit the content, layout, and apps on the page.
- Page Options: Edit the Page Name, Display Duration, Background Image, and hide or show the page.
- Get Link: Get a Full Web Address or a Relative Web Address that you can use to link this page from other locations in your site.
- Copy Page: Copy the page with its existing settings and content.
- Move Page: Move the page to another site, channel, or section. You can move pages between workspaces you can edit.
- Delete: Delete the page. A confirmation window appears to confirm deletion.
- Set Viewers: Choose different groups or individual viewers for a page. The default is all website visitors can view pages.
- Select Active next to each page to make the page active or inactive for your site.
https://help.blackboard.com/Web_Community_Manager/Administrator/Create_Content/Section_Workspace_Overview/Create_and_Manage_Sections

